
Adding text to your videos is a powerful way to communicate messages, highlight key points, and make your content more engaging. Whether you’re creating tutorials, promotional videos, or social media posts, KineMaster makes it easy to add and customize text overlays on your videos. Here’s a complete, beginner-friendly guide to help you get started.
Why Add Text in KineMaster?
- Enhance viewer engagement: Text can provide instructions, context, or emphasis.
- Share information: Add titles, captions, or callouts directly on your videos.
- Boost visual appeal: Custom fonts, colors, and animations help your content stand out.
Benefits of Using KineMaster for Text Overlays
- User-friendly interface: Simple tools anyone can use, even if you’re new to video editing.
- Customization: Control font, size, color, style, and position of your text.
- Layering: Add multiple layers of text, images, effects, and more.
- Audio integration: Combine text with background music or sound effects.
- Flexible export options: Save and share your finished video in various formats and resolutions.
Step 1: Download and Install KineMaster
- Open the Google Play Store (Android) or App Store (iOS).
- Search for KineMaster and tap Install or Get.
- Launch the KineMaster app after installation is complete.
Step 2: Start a New Project or Open an Existing One
- Open KineMaster and tap the plus (+) icon to start a new project, or select an existing project from the home screen.
- Choose your preferred aspect ratio (16:9, 9:16, 1:1, etc.).
- Import your video clips by tapping the Media Browser icon.
Step 3: Add Text to Your Video
- On the editing screen, tap the Layer icon (a stack of squares).
- Select Text from the layer options.
- Type your desired text using the on-screen keyboard.
- Tap OK or the checkmark to add the text to your video.
Step 4: Customize Your Text
- Tap the text box on your video to select it.
- Use the toolbar to:
- Change font – Choose from a variety of built-in fonts or download more.
- Adjust size & color – Pick your preferred size, color, and style.
- Position text – Drag and drop the text box to your desired location on the video frame.
- Resize or rotate – Use the handles to resize or rotate the text box.
- To change the duration, drag the edges of the text layer on the timeline.
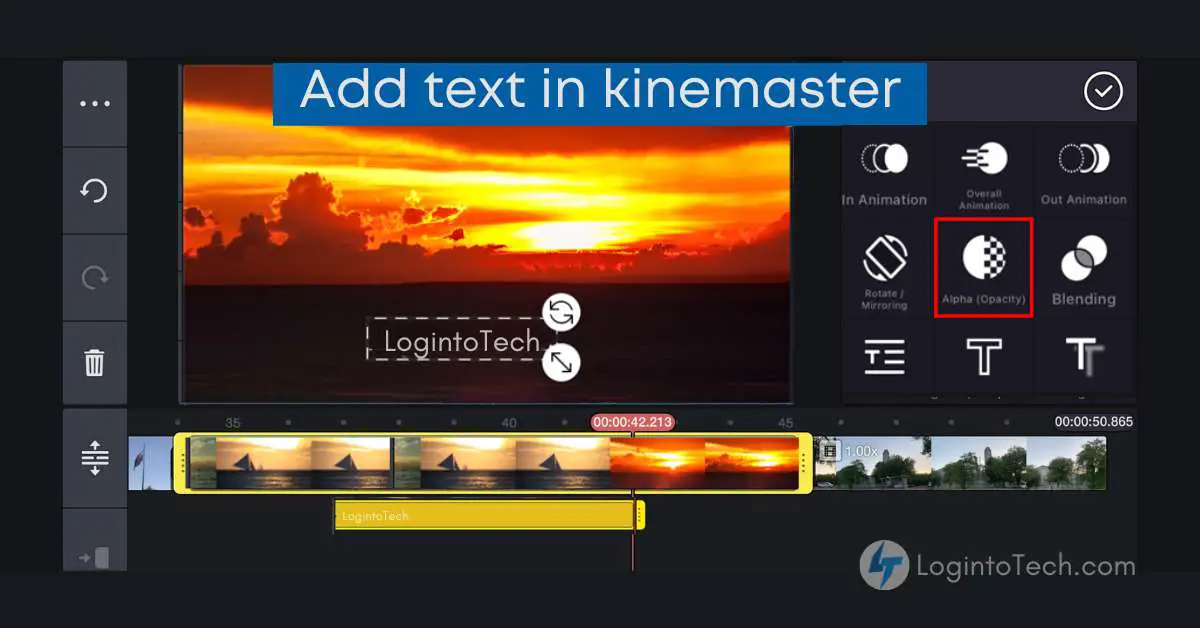
Step 5: Style and Animate Your Text
- Text Animations: With the text layer selected, tap In Animation or Out Animation to apply effects like fade, slide, or pop.
- Shadow & Outline: Add drop shadows, outlines, or backgrounds for extra visibility.
- Alignment: Use alignment tools to center, left, or right-align your text within the box.
Step 6: Preview and Export Your Video
- Tap the Play button to preview your video with the text overlay.
- If you’re happy with the result, tap the Export/Share icon (usually an arrow pointing up) in the top right.
- Choose your preferred resolution and file type, then tap Export to save or share your finished video.
Pro Tips for Adding Text in KineMaster
- Keep text concise and easy to read.
- Use contrasting colors for better visibility.
- Experiment with different fonts, sizes, and animations for creative effects.
- Add multiple text layers for titles, captions, or callouts.
- Preview your video several times to ensure text timing and positioning are perfect.
Frequently Asked Questions
Can I add multiple text layers in KineMaster?
Yes! You can add as many text layers as you need for titles, captions, or effects.
How do I change the text font in KineMaster?
Select the text layer, then tap the font option in the toolbar to browse and apply different fonts.
Can I animate text in KineMaster?
Absolutely! Use the In Animation, Overall Animation, and Out Animation options to make your text move or appear dynamically.
Will adding text affect video quality?
No, adding text overlays in KineMaster will not reduce your video’s quality when you export in high resolution.
Conclusion
Adding text in KineMaster is simple and opens up endless creative possibilities for your video projects. With just a few taps, you can personalize your videos, share important information, and make your content stand out. Try these steps today and elevate your video editing game!