
KineMaster is a powerful and user-friendly video editing app for Android and iOS. Among its many features, the cropping tool stands out as a must-have for trimming away unwanted portions, focusing on your subject, and preparing your video for different platforms. Here’s how you can crop videos like a pro in KineMaster.
What is KineMaster and What Can It Do?
- Edit videos with text, stickers, audio, and effects
- Support for multiple layers (video, image, audio)
- Trim, crop, and split video clips
- Adjust brightness, contrast, and saturation
- Add transitions, filters, and custom themes
- Export in various resolutions for social media or devices
Why Crop Videos?
- Remove distractions: Focus on the main subject by eliminating unwanted edges.
- Fit different platforms: Adjust the aspect ratio for YouTube (16:9), Instagram (1:1), TikTok (9:16), etc.
- Create engaging thumbnails: Crop for a bold, eye-catching cover image.
- Enhance composition: Improve framing for a more professional result.
Getting Started with KineMaster
- Download & Install: Get KineMaster from the Google Play Store or Apple App Store.
- Create a New Project: Open the app, tap the Create button, choose your aspect ratio, and import your video.
How to Crop a Video in KineMaster
- Import your video: Tap the media icon, select your video, and add it to the timeline.
- Select the video clip: Tap the video on the timeline to highlight it.
- Tap the Crop tool: Find the Crop icon in the menu or toolbar.
- Adjust the crop area: Drag the handles to select the part of the video you want to keep. Everything outside the box will be removed.
- Preview your crop: Tap play to check your selection. Make adjustments as needed.
- Apply and save: When satisfied, confirm the crop to save your changes.
Advanced Cropping & Customization
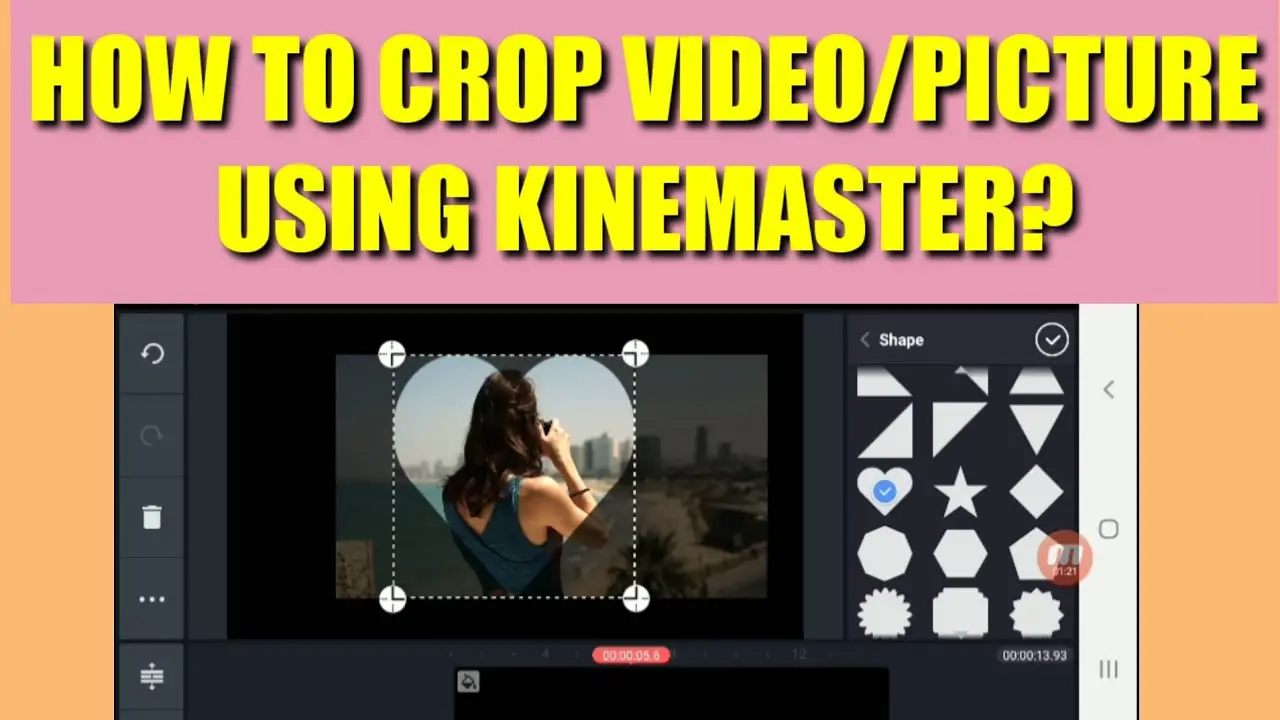
- Custom crop shapes: Use the “Custom” option in crop menu for creative framing.
- Split-screen effect: Crop two video clips and place them side-by-side for a dynamic split-screen look.
- Aspect ratio adjustment: Tap “Aspect Ratio” to fit your video perfectly to YouTube, Instagram, TikTok, and more.
- Adjust position, size, and rotation: Move, resize, or rotate the cropped area for precise control.
Adding Effects, Filters & Transitions
- Enhance your cropped video with color correction, brightness, or custom filters.
- Apply transitions (fade, crossfade, etc.) between clips for a smooth, professional result.
- Experiment with effects for a unique visual style.
Exporting & Sharing Your Cropped Video
- Choose video settings: Select export resolution, frame rate, and bitrate. Use presets for YouTube, Instagram, etc.
- Save to device: Export the finished video to your gallery.
- Share directly: KineMaster lets you upload straight to YouTube, Facebook, Instagram, and other platforms.
Pro Tips for Better Cropped Videos
- Plan your composition before cropping for best results.
- Check the platform’s recommended aspect ratio and resolution before exporting.
- Preview your edits several times to ensure nothing important is cut out.
- Use effects and transitions sparingly for a clean, professional look.
Frequently Asked Questions
Can I crop videos for Instagram or TikTok in KineMaster?
Yes! KineMaster lets you set the aspect ratio when starting a project or cropping a clip, so you can create videos for any platform.
Does cropping reduce video quality?
Cropping removes pixels, so if you crop a lot and export at a high resolution, the video may look less sharp. Try to crop only as much as necessary.
Can I undo a crop in KineMaster?
Yes, use the Undo button or edit the crop settings to restore your original video.
Conclusion
Cropping videos in KineMaster is simple and effective, whether you’re making content for social media or just cleaning up your footage. With these tools and tips, you can give your videos a polished, professional touch—right from your phone!